
 How to Setup MaxCDN With WordPress W3 Total Cache Plugin :-
CDN stand for ” Content Delivery network “, which is primary used for distributing your website load on network of servers that deliver cached static content from websites to users based on the geographic location of the user.
Check this article Why You Need a CDN for your WordPress Blog .
Presently daily i am getting average 4500 unique visitors on my WordPress site and some time i realize my website is opening slow and in the time of higher traffic my site is also getting problem that’s why i decided to switch my WordPress site to maxcdn for fast website. 🙂
Fast website is also good for SEO because no one wants to wait for long time to open a webpage.
Today i am going to show you How to Setup MaxCDN With WordPress W3 Total Cache Plugin ?
To install W3 Total Cache :-
1. Go to your WordPress Dashboard.
2. Go to Plugins > Add New.
3.Search for W3 Total Cache.
4. Click Install Now.
5. Click Activate Plugin.
6. Upon activation of the plugin, a new menu option will be added in the WordPress admin panel called Performance.
7. Click on the Performance tab to enter the configuration information.
Recommended Settings :-
Page Cache: Enable
Page Cache Method: Disk (Enhanced)
Database Cache: Disabled
Object Cache: Disabled
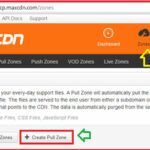
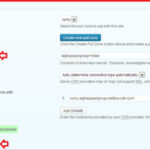
Now login to your maxcdn account, Click on the Zones and Click on the Create Pull Zone option to create a pull zone for your WordPress site.
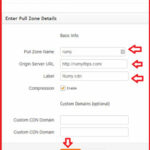
now you need to be enter your Pull zone name ( any thing ) , original server URL and put the label name here and click on the Create to create a pull zone here.
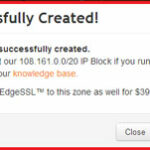
it will give you successful zone creation message.
it will give you information about your Zone information with your CDN URL.
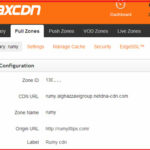
Now you need to add this information in your W3 Total cache plugin.
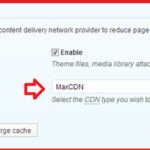
Navigate to General Settings > CDN > Select MaxCDN here.
Now navigate to Performance > CDN > Configuration. here Click on the Authorize option here.
it will redirect on your maxcdn dashboard , copy your Authorization key from here and paste here.
Now in the Replace site’s hostname with your CDN URL that you create earlier in Zone and Click on the Add CNAME. Finally click on the ” Test MaxCDN ” and click on the Save all settings options.
Now your CDN is ready. When you open your site , you are able to see your CDN URL in the time of opening page.
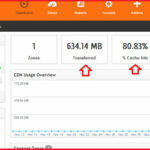
You are able to view your CDN bandwidth statics with MaxCDN dashboard. below shown statics is for my first 6 hour statics for my WordPress site.
Enjoy Faster WordPress site with Maxcdn.
Also Check :-
How To Speed Up WordPress Load Times
WordPress SEO Tips to Increase Search Traffic
How to Manually Reset Your WordPress Admin Password
How to set up two-step verification for WordPress
How to add Google Analytics to WordPress
How to Backup WordPress Sites to Dropbox


