Getting started with Hping3 :-
Hping3 is a command-line oriented TCP/IP packet assembler/analyzer. The interface is inspired to the ping(8) unix command, but hping isn’t only able to send ICMP echo requests. It supports TCP, UDP, ICMP and RAW-IP protocols, has a traceroute mode, the ability to send files between a covered channel, and many other features.
Hping3 is used in :-
- Firewall testing
- Advanced port scanning
- Network testing, using different protocols, TOS, fragmentation
- Manual path MTU discovery
- Advanced traceroute, under all the supported protocols
- Remote OS fingerprinting
- Remote uptime guessing
- TCP/IP stacks auditing
- hping can also be useful to students that are learning TCP/IP.
1. Find out Status of Host in case of ICMP blocked by Firewall
Most of time when you ping to any bank sites or any secure sites they are not gives you ping reply beacuse ICMP is blocked by firewall. so in this condition you can easily find out the status of host with hping3 command beacuse insted of icmp it,s using TCP or UDP packets.
| root@bt:~# hping3 –S www.icicibank.com –p 80 –c 2 |
– s syntex is used for SYN request, – p is indicating Protocol and 80 is used for HTTP. – c2 is used for sending request only 2 times. Normal ping :-
Hping 3 :-  2. Play with the Ports involved in the process
| root@bt:~# hping3 –S 192.168.1.1 –p ++50 –c 5 |
3. Idle Scanning
Idle scanning is a technique to portscan a remote system fully anonymous.
| root@bt:~# hping3 -I eth0 -SA 192.168.10.1 |
4. ICMP Ping
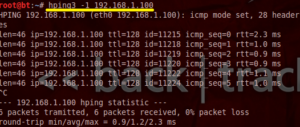
| root@bt:~# hping3 -1 192.168.1.100 |
– i syntax is used to ask hping to use icmp insted of TCP. by default hping is using TCP.
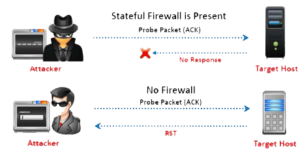
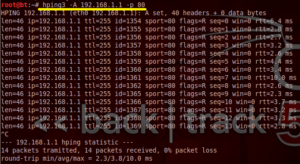
5. ACK scan on Port 80 :-
| root@bt:~# hping3 -A 192.168.1.100 –p 80 |
5. SYN scan on port 50-60
| root@bt:~# hping3 -8 50-56 –S 192.168.1.100 -V |
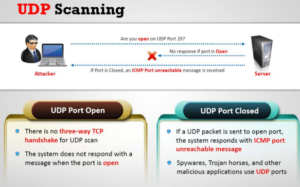
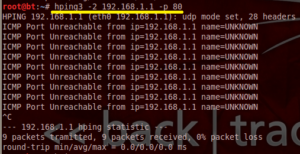
6. UDP Scan on Port 80 :-
| root@bt:~# hping3 -2 192.168.1.1 –p 80 |
7. Intercept all traffic containing HTTP signature
| root@bt:~# hping3 -9 HTTP – i eth0 |
8. Scan entire subnet for live host
| root@bt:~# hping3 -1 192.168.1.x – – rand-dest –I eth0 |
9. Collecting Initial Sequence number :-
| root@bt:~# hping3 192.168.1.100 –q –p 139 -S |
10. FIN , PUSH and URG scan on port 80
| root@bt:~# hping3 –F –P –U 192.168.1.1 –p 80 |
11. ICMP time-stamp
| root@bt:~# hping3 –1 192.168.1.1 – -icmp-ts –c 2 |
12. Finding Firewall
| root@bt:~# hping3 –1 192.168.1.1 – -icmp-addr –c 2 |
if this command is not giving the reply means this particular ip-address belongs to firewall.
13. Find out particular port is open on the server or not
| root@bt:~# hping3 – 8 50-56 –S 80 8.8.8.8 |
Also check :- Perform DDOS Attack with Hping Command
Hope you like my post.Getting started with Hping3. Please Share with others.


