

How to configure Cisco ASA 8.4 on GNS3 :-
“ Practice Makes Man Perfect” is really nice quote that i am following on my daily life. But it’s also important to understand where i do the practices for particular technology. If you are working on network technologies then you have to do more particular for hands on experience on particular technologies. If you want to do Practics for networking devices then GNS3 is perfect solution for you. 🙂
GNS3 is an open source software (under GPL) that simulate complex networks while being as close as possible to the way real networks perform. All of this without having dedicated network hardware such as routers and switches.
Navigate to http://www.gns3.net/download/ and download current version of gns3.
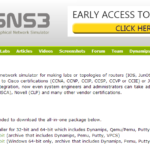
and install it on your system with all the products like Putty and wire-shark.
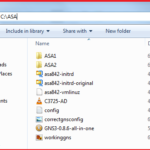
Now you need a Cisco ASA8.4 image. ( Download Now ). Create one folder and put your image files. Like in my case i have one folder in C drive named “ASA”.
Run GNS3 with Administrator right. Some time you have to disable your antivirus and local firewall on the time of gns3 lab.
Now navigate to Edit > Preferences.

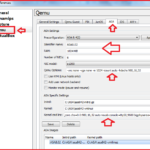
now navigate to Qemu , Navigate to ASA and do your seetings as per below image. make sure your Qemu options and kernal cmd lines are same as below.
Click on the Save option to save your settings.
## Qemu options: -vnc none -vga none -m 1024 -icount auto -hdachs 980,16,32
##Kernel cmd line: -append ide_generic.probe_mask=0x01 ide_core.chs=0.0:980,16,32 auto nousb console=ttyS0,9600 bigphysarea=65536
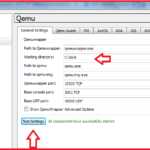
Now navigate to General settings in qemu option. in Working directory, change the directory to your location folder. Click on the “Test Setting” to test your setting.
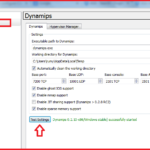
now navigate to Dynamips and click on the Test setting option to test your setting.
Your ASA image configuration done here. 🙂
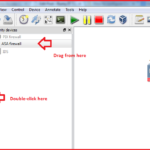
Double-click on the Cisco ASA image option and drag the firewall.
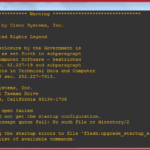
now right-click on the firewall and first select the Start option then select the Console option.
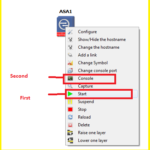
Now you have cisco ASA console window.
You can activate the licenses using below codes:
activation-key 0x4a3ec071 0x0d86fbf6 0x7cb1bc48 0x8b48b8b0 0xf317c0b5
activation-key 0xb23bcf4a 0x1c713b4f 0x7d53bcbc 0xc4f8d09c 0x0e24c6b6
Enjoy your Lab practices on Cisco ASA with GNS3. 🙂
Hope you like my post.How to configure Cisco ASA 8.4 on GNS3. Please share with others.


