Good Alexa ranking is a key indicator of a successful website or blog. As a rule of thumb, the better the Alexa ranking, the more business you’ll get. Alexa ranking helps Webmasters and advertisers see the true marketing potential of your Web site. The better your Alexa rank, the higher they will be willing to bid to buy advertising space on your Web site.
Most people consider it is valuable only for direct advertising. Given the fact that Alexa ranking for a site is calculated on the basis of how many visitors with the Alexa toolbar installed have visited that particular site, the results can be inaccurate.
In my previous article i wrote about How to Improve Alexa Ranking of Your Blog or Website and Boost Your Alexa Rank with AlexaBoostUp .
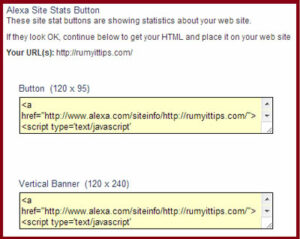
Today i am going to show you how to install Alexa widget on WordPress and Blogger blog ? Go to the http://www.alexa.com/siteowners/widgets and create a alexa wigdet for your blog.
Now copy the HTML code as per your desired size widget.
On WordPress :-
Go to your WordPress Dashboard > Appearances > Widgets and drag one text field in your desired location and paste your HTML code.
On Blogger :-
Go to the Blogger Dashboard > Select Layout > Add a Widget > Choose HTML/Java Script and Paste your Alexa HTML code here.
Hope you like my post.How to install Alexa widget on WordPress and Blogger blog. Please Share with others.
